Gin框架
Gin 是一个用 Go (Golang) 编写的 web 框架。 它是一个类似于 martini 但拥有更好性能的 API 框架, 由于 httprouter,速度提高了近 40 倍。 如果你是性能和高效的追求者, 你会爱上 Gin.

一、安装1
1.1、安装
要安装 Gin 软件包,需要先安装 Go 并设置 Go 工作区。
1.下载并安装 gin:
1
|
$ go get -u github.com/gin-gonic/gin
|
2.将 gin 引入到代码中:
1
|
import "github.com/gin-gonic/gin"
|
3.(可选)如果使用诸如 http.StatusOK 之类的常量,则需要引入 net/http 包:
1.2、基本案例
 1
 2
 3
 4
 5
 6
 7
 8
 9
10
11
12
13
14
15
16
17
18
19
20
21
|
package main

import "github.com/gin-gonic/gin"

func main() {
	r := gin.Default()
    // 返回一个json数据
	r.GET("/ping", func(c *gin.Context) {
		c.JSON(200, gin.H{
			"message": "pong",
		})
	})

    // 返回一个html页面
    /*
    r.LoadHTMLGlob("templates/*")
	r.GET("/index", func(c *gin.Context) {
		c.HTML(http.StatusOK, "index.html",nil)
	})*/
	r.Run() // 监听并在 0.0.0.0:8080 上启动服务
}
|
二、restful接口规范
REST与技术无关,代表的是一种软件架构风格,REST是Representational State Transfer的简称,中文翻译为“表征状态转移”或“表现层状态转化”。
推荐阅读阮一峰 理解RESTful架构
简单来说,REST的含义就是客户端与Web服务器之间进行交互的时候,使用HTTP协议中的4个请求方法代表不同的动作。
GET用来获取资源
POST用来新建资源
PUT用来更新资源
DELETE用来删除资源。
只要API程序遵循了REST风格,那就可以称其为RESTful API。目前在前后端分离的架构中,前后端基本都是通过RESTful API来进行交互。
例如,我们现在要编写一个管理书籍的系统,我们可以查询对一本书进行查询、创建、更新和删除等操作,我们在编写程序的时候就要设计客户端浏览器与我们Web服务端交互的方式和路径。按照经验我们通常会设计成如下模式:

同样的需求我们按照RESTful API设计如下:

Gin框架支持开发RESTful API的开发,代码如下:
 1
 2
 3
 4
 5
 6
 7
 8
 9
10
11
12
13
14
15
16
17
18
19
20
21
22
23
24
25
26
|
func main() {
	r := gin.Default()
	r.GET("/book", func(c *gin.Context) {
		c.JSON(200, gin.H{
			"message": "GET",
		})
	})

	r.POST("/book", func(c *gin.Context) {
		c.JSON(200, gin.H{
			"message": "POST",
		})
	})

	r.PUT("/book", func(c *gin.Context) {
		c.JSON(200, gin.H{
			"message": "PUT",
		})
	})

	r.DELETE("/book", func(c *gin.Context) {
		c.JSON(200, gin.H{
			"message": "DELETE",
		})
	})
}
|
二、Gin路由
2.1、路由方法
路由系统支持任意方式的请求,如下的方法用来提供对应方法来接收请求:
 1
 2
 3
 4
 5
 6
 7
 8
 9
10
|
func (group *RouterGroup) DELETE(relativePath string, handlers ...HandlerFunc) IRoutes
func (group *RouterGroup) GET(relativePath string, handlers ...HandlerFunc) IRoutes
func (group *RouterGroup) HEAD(relativePath string, handlers ...HandlerFunc) IRoutes
func (group *RouterGroup) OPTIONS(relativePath string, handlers ...HandlerFunc) IRoutes
func (group *RouterGroup) PATCH(relativePath string, handlers ...HandlerFunc) IRoutes
func (group *RouterGroup) POST(relativePath string, handlers ...HandlerFunc) IRoutes
func (group *RouterGroup) PUT(relativePath string, handlers ...HandlerFunc) IRoutes
// 任意路由
func (group *RouterGroup) ANY(relativePath string, handlers ...HandlerFunc) IRoutes
|
 1
 2
 3
 4
 5
 6
 7
 8
 9
10
11
12
13
14
15
16
17
18
19
20
21
22
23
24
25
26
27
|
package main

import (
	"github.com/gin-gonic/gin"
	"net/http"
)

func main() {
	r := gin.Default()
    // 加载模板
	r.LoadHTMLGlob("templates/*")
	r.GET("/get", func(c *gin.Context) {
		c.JSON(200, gin.H{
			"message": "GET请求",
		})
	})
	r.POST("/post",func(c *gin.Context){
		c.JSON(200, gin.H{
			"message": "POST请求",
		})
	})
	// 路由匹配不成功
	r.NoRoute(func(c *gin.Context) {
		c.HTML(http.StatusNotFound, "404.html", nil)
	})
	r.Run() // 监听并在 0.0.0.0:8080 上启动服务
}
|
2.2、路由分组
路由分组用于将多个路由进行统一的处理
 1
 2
 3
 4
 5
 6
 7
 8
 9
10
11
12
13
14
15
16
17
18
19
20
21
22
|
shop := r.Group("/shopping")
	{
		shop.GET("/index", sIndexHandler) // /shopping/index
		shop.GET("/home", sHomeHandler) // /shopping/home
	}

	blog := r.Group("/blog")
	{
		blog.GET("/index", liveIndexHandler)
		blog.GET("/home", liveHomeHandler)
	}

// 路由组也是支持嵌套的
app01 := r.Group("/app01")
	{
        app01.GET("/index", sIndexHandler)// /app01/index
		ashop := app01.Group("/shopping")
		{
		   ashop.GET("/bed",  ashopBedHandler) // /app01/shopping/bed
            ashop.GET("/food", ashopFoodHandler) // /app01/shopping/food
		}
	}
|
三、Gin视图函数
3.1、获取请求数据
3.1.1、获取基本请求数据
 1
 2
 3
 4
 5
 6
 7
 8
 9
10
11
12
13
14
|
r.GET("/test", func(c *gin.Context) {
		// 获取基本请求信息
		fmt.Println(c.Request.Method)     // GET
		fmt.Println(c.Request.URL)        // /test
		fmt.Println(c.Request.RemoteAddr) // 127.0.0.1:58581
		fmt.Println(c.ClientIP())         // 127.0.0.1
		// 获取请求头
		fmt.Println(c.Request.Header)
		fmt.Println(c.Request.Header["User-Agent"])
		fmt.Println(c.GetHeader("User-Agent"))

		c.String(200, "test OK!")

})
|
3.1.2、获取Get请求参数
Get请求url例子:/path?id=1234&name=Manu&value=111
获取Get请求参数的常用函数:
1
2
3
|
func(c*Context)Query(keystring)string
func(c*Context)DefaultQuery(key,defaultValuestring)string
func(c*Context)GetQuery(keystring)(string,bool)
|
 1
 2
 3
 4
 5
 6
 7
 8
 9
10
11
12
13
14
|
// 例⼦:
funcHandler(c *gin.Context){
    //获取name参数,通过Query获取的参数值是String类型。
    name:=c.Query("name")
    //获取name参数,跟Query函数的区别是,可以通过第⼆个参数设置默认值。
    name:=c.DefaultQuery("name","root")
    //获取id参数,通过GetQuery获取的参数值也是String类型,
    //区别是GetQuery返回两个参数,第⼀个是参数值,第⼆个参数是参数是否存在的bool值,可以⽤来判断参数是否存在。
    id,ok:=c.GetQuery("id")
    if!ok{
    //参数不存在
    }
}
// 提⽰:GetQuery函数,判断参数是否存在的逻辑是,参数值为空,参数也算存在,只有没有提交参数,才算参数不存在。
|
3.1.3、获取Post请求参数
获取Post请求参数的常用函数:
1
2
3
|
func(c*Context)PostForm(keystring)string
func(c*Context)DefaultPostForm(key,defaultValuestring)string
func(c*Context)GetPostForm(keystring)(string,bool)
|
 1
 2
 3
 4
 5
 6
 7
 8
 9
10
11
12
13
|
// 例⼦:
funcHandler(c *gin.Context){
    //获取name参数,通过PostForm获取的参数值是String类型。
    name:=c.PostForm("name")
    //跟PostForm的区别是可以通过第⼆个参数设置参数默认值
    name:=c.DefaultPostForm("name","root")
    //获取id参数,通过GetPostForm获取的参数值也是String类型,
        //区别是GetPostForm返回两个参数,第⼀个是参数值,第⼆个参数是参数是否存在的bool值,可以⽤来判断参数是否存在。
    id,ok:=c.GetPostForm("id")
    if!ok{
    //参数不存在
    }
}
|
3.1.4、获取URL路径参数
获取URL路径参数,指的是获取/user/:id这类型路由绑定的参数,这个例⼦绑定了⼀个参数id。
获取url路径参数常⽤函数:
1
|
func(c*Context)Param(keystring)string
|
1
2
3
4
5
6
|
// 例⼦:
r:=gin.Default()
r.GET("/user/:id",func(c*gin.Context){
    //获取url参数id
    id:=c.Param("id")
})
|
3.1.5、ShouldBind函数
ShouldBind强大的功能,可以基于请求的Content-Type识别请求数据类型并利用反射机制自动提取请求中querystring、form表单、JSON、XML等参数到结构体中。能够基于请求自动提取JSON、form表单和querystring类型的数据,并把值绑定到指定的结构体对象。
 1
 2
 3
 4
 5
 6
 7
 8
 9
10
11
12
13
14
15
16
17
18
19
20
21
22
23
24
25
26
27
28
29
30
31
32
33
34
35
36
37
38
39
40
|
// 前⾯获取参数的⽅式都是⼀个个参数的读取,⽐较⿇烦,Gin框架⽀持将请求参数⾃动绑定到⼀个struct对象,这种⽅式⽀持Get/Post请求,也⽀持http请求body内容为json/xml格式的参数。

// struct标签说明:
// json:"name" 数据格式为json格式,并且json字段名为name
// form:"name" 表单参数名为name
// 提⽰:你可以根据⾃⼰的需要选择⽀持的数据类型,例如需要⽀持json数据格式,可以这样定义字段标签:json:"name"
// 下⾯看下代码:
package main

import (
	"github.com/gin-gonic/gin"
	"log"
)

type User struct {
	Name  string `json:"name" form:"name"`
	Email string `json:"email" form:"email"`
}

func main() {
	// 1.创建路由
	// 默认使用了2个中间件Logger(), Recovery()
	r := gin.Default()

	r.POST("/user/:id", func(c *gin.Context) {
		//初始化userstruct
		u := User{}
		//通过ShouldBind函数,将请求参数绑定到struct对象,处理json请求代码是⼀样的。
		//如果是post请求则根据Content-Type判断,接收的是json数据,还是普通的http请求参数
		if c.ShouldBind(&u) == nil {
			//绑定成功,打印请求参数
			log.Println(":::", u.Name)
			log.Println(":::", u.Email)
		}
		//http请求返回⼀个字符串
		c.String(200, "Success")
	})

	r.Run(":8080")
}
|
ShouldBind有⼀系列函数,⼤致就是把前⾯的⽅式绑定到结构体的⽅式,如:ShouldBindUri()、ShouldBindQuery()等等,⽤法和ShouldBind类似,这⾥就不展开介绍了。
提⽰:如果你通过http请求body传递json格式的请求参数,并且通过post请求的⽅式提交参数,则需要将Content-Type设置为
application/json,如果是xml格式的数据,则设置为application/xml
3.1.6、CodePractice
(1)登录练习
 1
 2
 3
 4
 5
 6
 7
 8
 9
10
11
12
13
14
15
16
17
18
19
20
21
22
23
24
25
26
27
28
29
30
31
32
33
34
35
36
37
38
39
40
41
42
43
44
45
46
47
48
49
50
51
52
53
54
55
56
57
58
59
60
61
62
63
64
65
66
67
68
69
70
71
72
73
74
75
76
77
78
79
80
81
82
83
84
|
package main

import (
	"fmt"
	"github.com/gin-gonic/gin"
	"net/http"
)

func index(c *gin.Context) {
	c.HTML(http.StatusOK, "index.html", gin.H{"name": "Yuan"})
}

func login(c *gin.Context) {

    //  获取get数据
	user := c.Query("user")
	pwd := c.Query("pwd")
    c.DefaultQuery("use", "匿名用户")  // 查不到就用指定的默认值(第二个参数)
	// user = c.DefaultQuery("user","")
	fmt.Println("GET user",user)
	fmt.Println("GET pwd",pwd)
	// 获取请求方式
	fmt.Println(c.Request.Method)

	c.HTML(http.StatusOK, "login.html", nil)
}

func auth(c *gin.Context) {

	// 获取post数据
	user := c.PostForm("user")
	pwd := c.PostForm("pwd")  // c.PostFormArray
	// user := c.DefaultPostForm("user","")  // 查不到就用指定的默认值(第二个参数)

	fmt.Println("POST user",user)
	fmt.Println("POST pwd",pwd)
	if user == "yuan" && pwd == "123"{
		c.String(200,"验证成功!")
	}else {
		c.String(200,"验证失败!")
	}
}

func not_found(c *gin.Context) {
	c.HTML(http.StatusNotFound, "notFound.html", nil)
}

func article_year_month(c *gin.Context) {
	// 获取动态路径参数
	fmt.Println(c.Param("year"))
	fmt.Println(c.Param("month"))
	// 获取全路径
	// 获取url全路径   url :  协议:IP:端口:路径?get参数
	fmt.Println(c.FullPath())
}

func article_delete(c *gin.Context) {
	// 获取动态路径参数
	delete_id:=c.Param("delete_id")
	fmt.Println("删除书籍",delete_id)
	// 重定向
	//c.Header("Content-Type", "text/html; charset=utf-8")
	//c.String(200,"<h3>删除成功!</h3>")
	c.Redirect(http.StatusMovedPermanently,"/index")
}

var r = gin.Default()

func main() {

	r.LoadHTMLGlob("./templates/*")
	r.GET("/index", index)
	r.GET("/login", login)
	r.POST("/auth", auth)
	// 设置博客路由组
	blog := r.Group("/blog")
	{
		blog.GET("/articles/:year/:month", article_year_month)
		blog.GET("/articles/delete/:delete_id", article_delete)
	}
	// 没有匹配到路由的请求分配处理函数
	r.NoRoute(not_found)
	r.Run(":9090") // 监听并在 0.0.0.0:8080 上启动服务
}
|
(2)ShouldBind练习
 1
 2
 3
 4
 5
 6
 7
 8
 9
10
11
12
13
14
15
16
17
18
19
20
21
22
23
24
25
26
27
28
29
30
31
32
33
34
35
36
37
38
39
40
41
42
43
44
45
46
47
48
49
50
51
52
53
54
55
56
57
58
59
60
61
62
63
64
|
package main

import (
	"fmt"
	"net/http"

    "github.com/gin-gonic/gin"
)

type Login struct {
	User     string `form:"user" json:"user" binding:"required"`
	Password string `form:"password" json:"password" binding:"required"`
}

var login Login

func jsonHandler(c *gin.Context) {
	// ShouldBind()会根据请求的Content-Type自行选择绑定器
	if err := c.ShouldBind(&login); err == nil {
		fmt.Printf("%#v\n", login)
		c.JSON(http.StatusOK, gin.H{
			"user": login.User,
			"password": login.Password,
		})
	} else {
		c.JSON(http.StatusBadRequest, gin.H{"error": err.Error()})
	}
}
func formHandler(c *gin.Context){
	// ShouldBind()会根据请求的Content-Type自行选择绑定器
	if err := c.ShouldBind(&login); err == nil {
		c.JSON(http.StatusOK, gin.H{
			"user": login.User,
			"password": login.Password,
		})
	} else {
		c.JSON(http.StatusBadRequest, gin.H{"error": err.Error()})
	}
}
func querystringHandler(c *gin.Context){
	// ShouldBind()会根据请求的Content-Type自行选择绑定器
	if err := c.ShouldBind(&login); err == nil {
		c.JSON(http.StatusOK, gin.H{
			"user": login.User,
			"password": login.Password,
		})
	} else {
		c.JSON(http.StatusBadRequest, gin.H{"error": err.Error()})
	}
}


func main() {
	// 启动默认驱动
	r := gin.Default()
	//绑定json
	r.POST("/loginJson", jsonHandler)
	//绑定form表单
	r.POST("/loginForm", formHandler)
	//绑定querystring
	r.GET("/loginForm", querystringHandler)
	// 启动webserver
	r.Run(":9000")
}
|
3.2、响应方式
3.2.1、响应不同的数据格式
(1)响应简单字符串
1
2
3
|
r.GET("/str", func(c *gin.Context) {
		c.String(200, "hello world!")
})
|
(2)响应html页面
1
2
3
4
|
    r.LoadHTMLGlob("templates/*")
	r.GET("/index", func(c *gin.Context) {
		c.HTML(http.StatusOK, "index.html",nil)
	})
|
(3)响应json
1
2
3
4
5
6
|
// 返回一个json数据
	r.GET("/json", func(c *gin.Context) {
		c.JSON(200, gin.H{
			"message": "json数据",
		})
	})
|
(4)响应xml数据
1
2
3
4
|
// 返回一个xml数据
	r.GET("/xml", func(c *gin.Context) {
		c.XML(http.StatusOK, gin.H{"message": "xml消息"})
	})
|
(5)响应protobuf格式(谷歌开发的高效存储读取的工具)
 1
 2
 3
 4
 5
 6
 7
 8
 9
10
11
12
13
14
15
16
17
|
func indexHandler(c *gin.Context) {

	//c.XML(http.StatusOK, gin.H{"message":"消息"})
	//c.YAML(http.StatusOK, gin.H{"message":"消息"})
	reps := []int64{int64(9),int64(55)}

	// 自定义数据
	label := "你好啊,今天天气挺好的"

	// 传protobuf格式数据
	data := &protoexample.Test{
		Label: &label,
		Reps: reps,
	}
	fmt.Println(data)
	c.ProtoBuf(200,data)
}
|
3.2.2、静态文件
1
2
|
// 静态文件配置
r.Static("/static", "./static")
|
3.2.3、重定向
1
2
|
c.Redirect(http.StatusMovedPermanently, "http://www.baidu.com")
c.Redirect(http.StatusMovedPermanently, "/xml")
|
3.2.4、异步响应
 1
 2
 3
 4
 5
 6
 7
 8
 9
10
11
12
13
14
15
16
17
18
19
20
21
22
23
24
25
26
27
28
29
30
31
32
33
34
35
|
package main

import (
	"log"
	"time"

	"github.com/gin-gonic/gin"
)

func main() {
	// 1.创建路由
	// 默认使用了2个中间件Logger(), Recovery()
	r := gin.Default()
	// 1.异步
	r.GET("/async", func(c *gin.Context) {
		// 需要搞一个副本
		copyContext := c.Copy()
		// 异步处理
		go func() {
			time.Sleep(3 * time.Second)
			log.Println("异步执行:" + copyContext.Request.URL.Path)
		}()

		c.JSON(200, gin.H{"msg": "异步执行中"})

	})
	// 2.同步
	r.GET("/sync", func(c *gin.Context) {
		time.Sleep(3 * time.Second)
		log.Println("同步执行:" + c.Request.URL.Path)
		c.JSON(200, gin.H{"msg": "同步执行结束"})
	})

	r.Run(":8080")
}
|
四、Gin模板
4.1 、Template模板语法
4.1.1、基本示例
以下为test.html文件的内容,里面使用了一个template语法{{.}}。
 1
 2
 3
 4
 5
 6
 7
 8
 9
10
|
<!DOCTYPE html>
<html>
	<head>
		<meta http-equiv="Content-Type" content="text/html; charset=utf-8">
		<title>Title</title>
	</head>
	<body>
		{{ . }}
	</body>
</html>
|
以下是test.html同目录下的一个go web程序:
 1
 2
 3
 4
 5
 6
 7
 8
 9
10
11
12
13
14
15
16
17
18
19
20
21
22
23
24
25
|
package main

import (
"html/template"
"net/http"
)

func tmpl(w http.ResponseWriter, r *http.Request) {
	t1, err := template.ParseFiles("test.html")
	if err != nil {
		panic(err)
	}
	t1.Execute(w, "hello yuan")
}

func main() {
	server := http.Server{
		Addr: "127.0.0.1:8080",
	}
	http.HandleFunc("/index", tmpl)
	server.ListenAndServe()
}
|
前面的html文件中使用了一个template的语法{{.}},这部分是需要通过go的template引擎进行解析,然后替换成对应的内容。
在go程序中,handler函数中使用template.ParseFiles("test.html"),它会自动创建一个模板(关联到变量t1上),并解析一个或多个文本文件(不仅仅是html文件),解析之后就可以使用Execute(w,"hello world")去执行解析后的模板对象,执行过程是合并、替换的过程。例如上面的{{.}}中的.会替换成当前对象"hello world",并和其它纯字符串内容进行合并,最后写入w中,也就是发送到浏览器"hello world"。
示例中{{.}},这个点是顶级作用域范围内的,它代表Execute()的第二个参数。
4.1.1、变量渲染
视图部分:
 1
 2
 3
 4
 5
 6
 7
 8
 9
10
11
12
13
14
15
16
17
18
19
20
21
22
23
24
25
26
27
28
29
30
31
32
33
34
35
36
37
38
39
40
41
42
43
|
package main

import (
	"fmt"
	"html/template"
	"net/http"
)

// main.go
type Student struct {
	Name   string    // 注意大小写
 	Gender string
	Age    int
	Courses []string
}

func index(w http.ResponseWriter, r *http.Request) {
	// 1、解析指定文件生成模板对象
	tmpl, err := template.ParseFiles("templates/index.html")
	if err != nil {
		fmt.Println("create template failed, err:", err)
		return
	}
	// 2、利用给定数据渲染模板,并将结果写入w

	// obj1:=Student{"yuan","male",23}
	s1 := Student{"yuan", "male", 23,[]string{"chinese","math","english"}}
	obj := map[string]interface{}{
		"s1":       s1,
		"books":    []string{"三国演义", "西游记", "红楼梦", "金瓶梅"},
		"articles": []string{},
	}
	tmpl.Execute(w, obj)
}

func main() {
	http.HandleFunc("/", index)
	err := http.ListenAndServe(":8080", nil)
	if err != nil {
		fmt.Println("HTTP server failed,err:", err)
		return
	}
}
|
(1) 深度查询句点符.
 1
 2
 3
 4
 5
 6
 7
 8
 9
10
|
<p>hi,{{.}}</p>
<p>姓名: {{.Name}}</p>
<p>年龄: {{.Age}}</p>
<p>性别: {{.Gender}}</p>

<p>{{.s1}}</p>
<p>{{.s1.Name}}</p>
<p>{{.s1.Courses}}</p>
<p>{{.books}}</p>
<p>{{index .books 2}}</p>
|
range、with、if等内置action都有自己的本地作用域。
(2) 管道pipeline
pipeline是指产生数据的操作。比如{{.}}、{{.Name}}、funcname args等。
可以使用管道符号|链接多个命令,用法和unix下的管道类似:|前面的命令将运算结果(或返回值)传递给后一个命令的最后一个位置。
例如:
1
|
{{.s1.Age|printf "姓名:%s\n 年龄:%v" "yuan"}}
|
需要注意的是,并非只有使用了|才是pipeline。Go template中,pipeline的概念是传递数据,只要能产生数据的,都是pipeline。这使得某些操作可以作为另一些操作内部的表达式先运行得到结果,就像是Unix下的命令替换一样。
1
|
{{println (len "yuan")}}
|
(3) 条件判断
1
2
3
|
{{if  pipeline}} T1 {{end}}
{{if  pipeline}} T1 {{else}} T0 {{end}}
{{if  pipeline}} T1 {{else if pipeline}} T0 {{end}}
|
表达式为false的情况是各种数据对象的0值:数值0,指针或接口是nil,数组、slice、map或string则是len为0。
1
2
3
4
5
|
{{if .articles }}
{{.articles}}
{{else}}
<p>没有任何文章</p>
{{end}}
|
(4) range循环
1
2
|
{{range $value := .}}
{{range $key,$value := .}}
|
- 如果range中只赋值给一个变量,则这个变量是当前正在迭代元素的值。如果赋值给两个变量,则第一个变量是索引值(map/slice是数值,map是key),第二个变量是当前正在迭代元素的值。
- 变量名以
$开头
1
2
3
4
5
6
7
|
{{range $index,$value := .books}}
<p>{{$index}} : {{$value}} </p>
{{end}}

{{range $index,$value := .s1.Courses}}
<p>{{$index}} : {{$value}} </p>
{{end}}
|
(5) with语句
1
2
3
4
|
{{with .s1}}
<p>{{.Name}}</p>
<p>{{.Age}}</p>
{{end}}
|
(6) 注释
注释方式:{{/* a comment */}}。注释后的内容不会被引擎进行替换。但需要注意,注释行在替换的时候也会占用行,所以应该去除前缀和后缀空白,否则会多一空行。
1
|
{{- /* this line is a comment */}}
|
(7) 变量赋值
可以在template中定义变量:
1
2
3
4
|
// 未定义过的变量
$var := pipeline
// 已定义过的变量
$var = pipeline
|
4.1.2、GIn的模板函数
(1)默认模板函数
语法格式:
functionName [Argument...]
Argument参数是可选的,如果有多个参数,参数直接用空格分隔。
| 函数名 |
函数调用格式 |
对应关系运算 |
说明 |
| eq |
eq arg1 arg2 |
arg1 == arg2 |
arg1等于arg2则返回true |
| ne |
ne arg1 arg2 |
arg1 != arg2 |
arg1不等于arg2则返回true |
| lt |
lt arg1 arg2 |
arg1 < arg2 |
arg1小于arg2则返回true |
| le |
le arg1 arg2 |
arg1 <= arg2 |
arg1小于等于arg2则返回true |
| gt |
gt arg1 arg2 |
arg1 > arg2 |
arg1大于arg2则返回true |
| ge |
ge arg1 arg2 |
arg1 >= arg2 |
arg1大于等于arg2则返回true |
| and |
and 表达式1 表达式2 |
表达式1 && 表达式2 |
表达式1和表达式2都为真的时候返回true |
| or |
or 表达式1 表达式2 |
表达式1 || 表达式2 |
表达式1和表达式2其中一个为真的时候返回true |
| not |
not 表达式 |
!表达式 |
表达式为false则返回true, 反之返回false |
| index |
index arg 索引/键 |
index x 2 即x[2] |
每个被索引的主体必须是数组、切片或者字典 |
| len |
len arg |
len x 即x的元素个数 |
用于计算数组大小 |
| urlquery |
urlquery arg |
urlquery url |
用于url编码 |
(2)自定义模板函数
视图部分:
 1
 2
 3
 4
 5
 6
 7
 8
 9
10
11
12
13
14
15
16
17
18
19
20
21
22
23
24
25
26
27
28
29
30
31
32
33
34
|
package main

import (
	"fmt"
	"html/template"
	"net/http"
)

func index(w http.ResponseWriter, r *http.Request) {
	// 1、解析指定文件生成模板对象
	t1 := template.New("index.html")
	t1.Funcs(funcMap).ParseFiles("templates/index.html")
	t1.Execute(w, nil)
}

// 自定义模板函数:
func add(x int, y int) int {
	return x + y
}

// 将自定义模板其添加到FuncMap结构中,并将此函数命名为"add",以后在待解析的内容中就可以调用"add"函数。
var funcMap = template.FuncMap{
	"add": add,
}

func main() {

	http.HandleFunc("/", index)
	err := http.ListenAndServe(":8099", nil)
	if err != nil {
		fmt.Println("HTTP server failed,err:", err)
		return
	}
}
|
模板部分:
4.1.3、Go模板的嵌套与继承
(1) 嵌套:define和template
在实际项目中,我们不可能只有一个模板,一般来说都有很多个模板,而且这些模板也会共享一些公共的模板,这些公共的模板我们都可以定义成子模板,在需要的时候调用子模板,就可以将子模板的内容嵌入当前模板中。
提示:在项目中使用子模板,可以让项目模板具有模块化的能力,提高模块复用能力和可维护性。
define可以直接在待解析内容中定义一个模板,定义了模板之后,可以使用template这个action来执行模板。template有两种格式:
1
2
|
{{template "name"}}
{{template "name" pipeline}}
|
第一种是直接执行名为name的template,点设置为nil。第二种是点".“设置为pipeline的值,并执行名为name的template。可以将template看作是函数:
1
2
|
template("name)
template("name",pipeline)
|
示例:
t1.html文件内容如下:
 1
 2
 3
 4
 5
 6
 7
 8
 9
10
11
12
13
14
15
16
17
18
19
|
<!DOCTYPE html>
<html lang="en">

<head>
	<meta charset="utf-8">
	<meta http-equiv="X-UA-Compatible" content="IE=9">
	<title>Go Web Programming</title>
</head>

<body>
	<div> This is t1.html before</div>
	<div>This is the value of the dot in t1.html - [{{ . }}]</div>
	<hr />
	{{ template "t2.html" }}
	<hr />
	<div> This is t1.html after</div>
</body>

</html>
|
因为内部有{{template "t2.html"}},且此处没有使用define去定义名为"t2.html"的模板,所以需要加载解析名为t2.html的文件。t2.html文件内容如下:
1
2
3
4
|
<div style="background-color: yellow;">
	This is t2.html<br/>
	This is the value of the dot in t2.html - [{{ . }}]
</div>
|
处理这两个文件的handler函数如下:
1
2
3
4
5
|
func process(w http.ResponseWriter, r *http.Request) {
	t, _ := template.ParseFiles("t1.html", "t2.html")
	t.Execute(w, "Hello World!")
}
|
上面也可以不额外定义t2.html文件,而是直接在t1.html文件中使用define定义一个模板。修改t1.html文件如下:
 1
 2
 3
 4
 5
 6
 7
 8
 9
10
11
12
13
14
15
16
17
18
19
20
21
22
23
24
25
26
|
<!DOCTYPE html>
<html lang="en">

<head>
	<meta charset="utf-8">
	<meta http-equiv="X-UA-Compatible" content="IE=9">
	<title>Go Web Programming</title>
</head>

<body>
	<div> This is t1.html before</div>
	<div>This is the value of the dot in t1.html - [{{ . }}]</div>
	<hr />
	{{ template "t2.html" }}
	<hr />
	<div> This is t1.html after</div>
</body>

</html>

{{define "t2.html"}}
<div style="background-color: yellow;">
	This is t2.html<br/>
	This is the value of the dot in t2.html - [{{ . }}]
</div>
{{end}}
|
然后在handler中,只需解析t1.html一个文件即可。
1
2
3
4
5
|
func process(w http.ResponseWriter, r *http.Request) {
	t, _ := template.ParseFiles("t1.html")
	t.Execute(w, "Hello World!")
}
|
(2) 继承:block块
根据官方文档的解释:block等价于define定义一个名为name的模板,并在"有需要"的地方执行这个模板,执行时将”.“设置为pipeline的值。
但应该注意,block的第一个动作是执行名为name的模板,如果不存在,则在此处自动定义这个模板,并执行这个临时定义的模板。换句话说,block可以认为是设置一个默认模板。
例如:
1
|
{{block "T1" .}} one {{end}}
|
它首先表示{{template "T1" .}},也就是说先找到T1模板,如果T1存在,则执行找到的T1,如果没找到T1,则临时定义一个{{define "T1"}} one {{end}},并执行它。
下面是正常情况下不使用block的示例。
home.html文件内容如下:
1
2
3
4
5
6
7
8
9
|
<html>
	<head>
		<meta http-equiv="Content-Type" content="text/html; charset=utf-8">
		<title>Go Web Programming</title>
	</head>
	<body>
		{{ template "content" }}
	</body>
</html>
|
在此文件中指定了要执行一个名为"content"的模板,但此文件中没有使用define定义该模板,所以需要在其它文件中定义名为content的模板。现在分别在两个文件中定义两个content模板:
red.html文件内容如下:
{{ define "content" }}
	<h1 style="color: red;">Hello World!</h1>
{{ end }}
blue.html文件内容如下:
1
2
3
|
{{ define "content" }}
	<h1 style="color: blue;">Hello World!</h1>
{{ end }}
|
在handler中,除了解析home.html,还根据需要解析red.html或blue.html:
 1
 2
 3
 4
 5
 6
 7
 8
 9
10
|
func process(w http.ResponseWriter, r *http.Request) {
	rand.Seed(time.Now().Unix())
	t := template.New("test")
	if rand.Intn(10) > 5 {
		t, _ = template.ParseFiles("home.html", "red.html")
	} else {
		t, _ = template.ParseFiles("home.html", "blue.html")
	}
	t.Execute(w,"")
}
|
如果使用block,那么可以设置默认的content模板。例如将原本定义在blue.html中的content设置为默认模板。
修改home.html:
 1
 2
 3
 4
 5
 6
 7
 8
 9
10
11
|
<html>
    <head>
        <meta http-equiv="Content-Type" content="text/html; charset=utf-8">
        <title>Go Web Programming</title>
    </head>
    <body>
        {{ block "content" . }}
            <h1 style="color: blue;">Hello World!</h1>
        {{ end }}
    </body>
</html>
|
然后修改handler:
 1
 2
 3
 4
 5
 6
 7
 8
 9
10
|
func process(w http.ResponseWriter, r *http.Request) {
	rand.Seed(time.Now().Unix())
	t := template.New("test")
	if rand.Intn(10) > 5 {
		t, _ = template.ParseFiles("home.html", "red.html")
	} else {
		t, _ = template.ParseFiles("home.html")
	}
	t.Execute(w,"")
}
|
当执行else语句块的时候,发现home.html中要执行名为content的模板,但在ParseFiles()中并没有解析包含content模板的文件。于是执行block定义的content模板。而执行非else语句的时候,因为red.html中定义了content,会直接执行red.html中的content。
block通常设置在顶级的根文件中,例如上面的home.html中。
(3) 继承案例
 1
 2
 3
 4
 5
 6
 7
 8
 9
10
11
12
13
14
15
16
17
18
19
20
21
22
23
24
25
26
27
28
29
30
31
32
33
34
35
36
37
38
39
40
41
42
43
44
45
46
47
48
49
50
|
package main

import (
	"fmt"
	"net/http"
	"html/template"
)

// main.go
func index(w http.ResponseWriter, r *http.Request) {
	fmt.Println("index...")
	// 1、解析指定文件生成模板对象
	tmpl, err := template.ParseFiles("./templates/layout.html","./templates/index.html","./templates/ads.html")
	if err != nil {
		fmt.Println("create template failed, err:", err)
		return
	}
	// 2、利用给定数据渲染模板,并将结果写入w
	err = tmpl.ExecuteTemplate(w,"index.html",nil)
	if err != nil {
		fmt.Println("render template failed, err:", err)
		return
	}
}

func archives(w http.ResponseWriter, r *http.Request) {
	fmt.Println("achives...")
	// 1、解析指定文件生成模板对象
	tmpl, err := template.ParseFiles("./templates/layout.html","./templates/archives.html","./templates/ads.html")
	if err != nil {
		fmt.Println("create template failed, err:", err)
		return
	}
	// 2、利用给定数据渲染模板,并将结果写入w
	err = tmpl.ExecuteTemplate(w,"archives.html",nil)
	if err != nil {
		fmt.Println("render template failed, err:", err)
		return
	}
}

func main() {
	http.HandleFunc("/index", index)
	http.HandleFunc("/archives", archives)
	err := http.ListenAndServe(":6677", nil)
	if err != nil {
		fmt.Println("HTTP server failed,err:", err)
		return
	}
}
|
templates/layout.html
 1
 2
 3
 4
 5
 6
 7
 8
 9
10
11
12
13
14
15
16
17
18
19
20
21
22
23
24
25
26
27
28
29
30
31
32
33
34
35
36
37
38
39
40
41
42
43
44
45
46
47
48
49
50
51
52
53
54
55
56
57
58
59
60
61
62
|
<!DOCTYPE html>
<html lang="en">
<head>
    <meta charset="UTF-8">
    <title>Title</title>
    <!-- 最新版本的 Bootstrap 核心 CSS 文件 -->
    <link rel="stylesheet" href="https://cdn.jsdelivr.net/npm/bootstrap@3.3.7/dist/css/bootstrap.min.css" integrity="sha384-BVYiiSIFeK1dGmJRAkycuHAHRg32OmUcww7on3RYdg4Va+PmSTsz/K68vbdEjh4u" crossorigin="anonymous">
    <style>
        *{
            margin: 0;
            padding: 0;
        }
        .header{
            width: 100%;
            background-color: #369;
            color: white;
            line-height: 48px;
        }
        .content{
            margin-top: 10px;
        }
    </style>
</head>
<body>
<div class="header">yuan老师的个人博客</div>
<div class="content container-fluid">
    <div class="row">
        <div class="col-md-2">
            <div class="panel panel-info">
                <div class="panel-heading">文章分类</div>
                <div class="panel-body">
                    Panel content
                </div>
            </div>
            <div class="panel panel-danger">
                <div class="panel-heading">文章标签</div>
                <div class="panel-body">
                    Panel content
                </div>
            </div>
            <div class="panel panel-success">
                <div class="panel-heading">其它</div>
                <div class="panel-body">
                    Panel content
                </div>
            </div>
        </div>
        <div class="col-md-8">
            <div class="content">
                {{block "content" .}}
                {{end}}
            </div>
        </div>

        {{/*模板嵌套*/}}
        <div class="col-md-2">
            {{template "ads.html"}}
        </div>
    </div>
</div>
</body>
</html>
|
templates/index.html,templates/article_detail.html,templates/archives.html
 1
 2
 3
 4
 5
 6
 7
 8
 9
10
11
12
13
|
// index.html
{{template "layout.html" .}}

{{define "content"}}
    Hello index !!!
{{end}}

// archives.html
{{template "layout.html" .}}

{{define "content"}}
    Hello archievs!!!
{{end}}
|
tmpl, err := template.ParseFiles("./templates/layout.html","./templates/index.html","./templates/archives.html","./templates/ads.html")
这样的解析会发生覆盖行为,即最后的content会覆盖前面的content。
模板解析原理
4.2、Gin模板语法
4.2.1、基本渲染语法
- Gin支持加载HTML模板, 然后根据模板参数进行配置并返回相应的数据,本质上就是字符串替换
- Gin框架中使用
LoadHTMLGlob()或者LoadHTMLFiles()方法进行HTML模板渲染。
将template的渲染数据的案例转换为gin版本,模板不变:
 1
 2
 3
 4
 5
 6
 7
 8
 9
10
11
12
13
14
15
16
17
18
19
20
21
22
23
24
25
26
27
28
29
30
31
32
33
|
package main

import (
	"github.com/gin-gonic/gin"
	"net/http"
)

// main.go
type Student struct {
	Name   string    // 注意大小写
	Gender string
	Age    int
	Courses []string
}

func index(c *gin.Context) {

	s1 := Student{"yuan", "male", 23,[]string{"chinese","math","english"}}
	c.HTML(http.StatusOK, "index.html", gin.H{
		"s1":       s1,
		"books":    []string{"三国演义", "西游记", "红楼梦", "金瓶梅"},
		"articles": []string{},
	})
}

func main() {
	r := gin.Default()

	// 返回一个html页面
	r.LoadHTMLGlob("templates/*")
	r.GET("/index",index)
	r.Run() // 监听并在 0.0.0.0:8080 上启动服务
}
|
4.2.2、自定义模板函数
 1
 2
 3
 4
 5
 6
 7
 8
 9
10
11
12
13
|
func main() {

	router := gin.Default()
	router.SetFuncMap(template.FuncMap{
		"add": func(x, y int) int {
			return x + y
		},
	})
	// 返回一个html页面
	router.LoadHTMLGlob("templates/*")
	router.GET("/index", index)
	router.Run() // 监听并在 0.0.0.0:8080 上启动服务
}
|
4.2.3、模板嵌套与继承
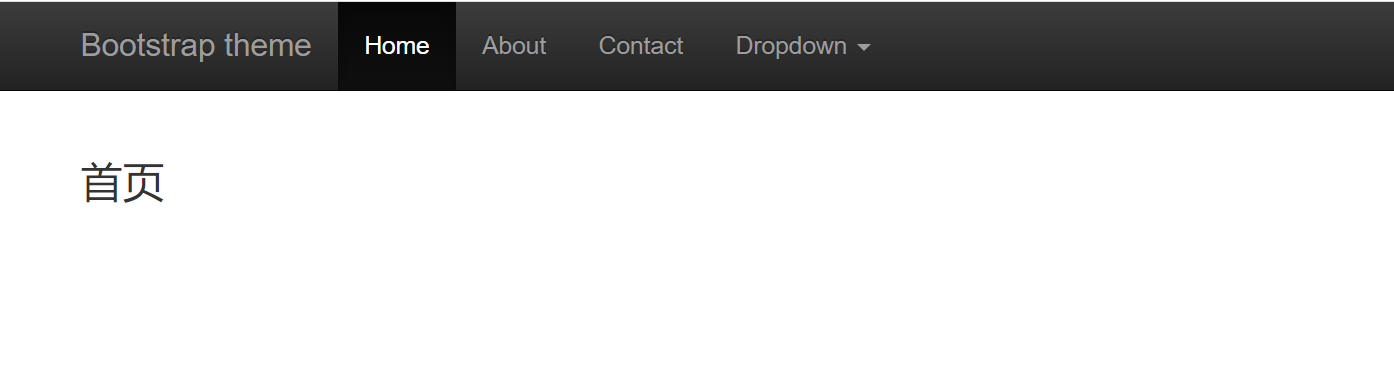
Gin框架默认都是使用单模板,如果需要使用block template功能,可以通过"https://github.com/gin-contrib/multitemplate"库实现,具体示例如下:
base.html
 1
 2
 3
 4
 5
 6
 7
 8
 9
10
11
12
13
14
15
16
17
18
19
20
21
22
23
24
25
26
27
28
29
30
31
32
33
34
35
36
37
38
39
40
41
42
43
44
45
46
47
48
49
50
51
52
53
54
55
56
57
58
59
60
61
62
63
64
65
66
67
68
69
70
71
72
73
74
75
76
77
78
79
80
81
82
83
84
85
86
87
88
89
90
91
92
93
94
95
|
<!doctype html>
<html lang="zh-CN">
<head>
    <meta charset="utf-8">
    <meta http-equiv="X-UA-Compatible" content="IE=edge">
    <meta name="viewport" content="width=device-width, initial-scale=1">
    <!-- The above 3 meta tags *must* come first in the head; any other head content must come *after* these tags -->
    <meta name="description" content="">
    <meta name="author" content="">
    <link rel="icon" href="https://cdn.jsdelivr.net/npm/@bootcss/v3.bootcss.com@1.0.10/favicon.ico">
    <link rel="canonical" href="https://getbootstrap.com/docs/3.4/examples/theme/">

    <title>Theme Template for Bootstrap</title>

    <!-- Bootstrap core CSS -->
    <link href="https://cdn.jsdelivr.net/npm/@bootcss/v3.bootcss.com@1.0.10/dist/css/bootstrap.min.css" rel="stylesheet">
    <!-- Bootstrap theme -->
    <link href="https://cdn.jsdelivr.net/npm/@bootcss/v3.bootcss.com@1.0.10/dist/css/bootstrap-theme.min.css" rel="stylesheet">
    <!-- IE10 viewport hack for Surface/desktop Windows 8 bug -->
    <link href="https://cdn.jsdelivr.net/npm/@bootcss/v3.bootcss.com@1.0.10/assets/css/ie10-viewport-bug-workaround.css" rel="stylesheet">

    <!-- Custom styles for this template -->
    <link href="https://cdn.jsdelivr.net/npm/@bootcss/v3.bootcss.com@1.0.10/examples/theme/theme.css" rel="stylesheet">

    <!-- Just for debugging purposes. Don't actually copy these 2 lines! -->
    <!--[if lt IE 9]><script src="https://cdn.jsdelivr.net/npm/@bootcss/v3.bootcss.com@1.0.10/assets/js/ie8-responsive-file-warning.js"></script><![endif]-->
    <script src="https://cdn.jsdelivr.net/npm/@bootcss/v3.bootcss.com@1.0.10/assets/js/ie-emulation-modes-warning.js"></script>

    <!-- HTML5 shim and Respond.js for IE8 support of HTML5 elements and media queries -->
    <!--[if lt IE 9]>
    <script src="https://oss.maxcdn.com/html5shiv/3.7.3/html5shiv.min.js"></script>
    <script src="https://oss.maxcdn.com/respond/1.4.2/respond.min.js"></script>
    <![endif]-->
</head>

<body>

<!-- Fixed navbar -->
<nav class="navbar navbar-inverse navbar-fixed-top">
    <div class="container">
        <div class="navbar-header">
            <button type="button" class="navbar-toggle collapsed" data-toggle="collapse" data-target="#navbar" aria-expanded="false" aria-controls="navbar">
                <span class="sr-only">Toggle navigation</span>
                <span class="icon-bar"></span>
                <span class="icon-bar"></span>
                <span class="icon-bar"></span>
            </button>
            <a class="navbar-brand" href="#">Bootstrap theme</a>
        </div>
        <div id="navbar" class="navbar-collapse collapse">
            <ul class="nav navbar-nav">
                <li class="active"><a href="#">Home</a></li>
                <li><a href="#">About</a></li>
                <li><a href="#">Contact</a></li>
                <li class="dropdown">
                    <a href="#" class="dropdown-toggle" data-toggle="dropdown" role="button" aria-haspopup="true" aria-expanded="false">Dropdown <span class="caret"></span></a>
                    <ul class="dropdown-menu">
                        <li><a href="#">Action</a></li>
                        <li><a href="#">Another action</a></li>
                        <li><a href="#">Something else here</a></li>
                        <li role="separator" class="divider"></li>
                        <li class="dropdown-header">Nav header</li>
                        <li><a href="#">Separated link</a></li>
                        <li><a href="#">One more separated link</a></li>
                    </ul>
                </li>
            </ul>
        </div><!--/.nav-collapse -->
    </div>
</nav>

<div class="container theme-showcase" role="main">


    <div class="content">
        {{block "content" .}}
        {{end}}
    </div>


</div> <!-- /container -->


<!-- Bootstrap core JavaScript
================================================== -->
<!-- Placed at the end of the document so the pages load faster -->
<script src="https://cdn.jsdelivr.net/npm/jquery@1.12.4/dist/jquery.min.js" integrity="sha384-nvAa0+6Qg9clwYCGGPpDQLVpLNn0fRaROjHqs13t4Ggj3Ez50XnGQqc/r8MhnRDZ" crossorigin="anonymous"></script>
<script>window.jQuery || document.write('<script src="https://cdn.jsdelivr.net/npm/@bootcss/v3.bootcss.com@1.0.10/assets/js/vendor/jquery.min.js"><\/script>')</script>
<script src="https://cdn.jsdelivr.net/npm/@bootcss/v3.bootcss.com@1.0.10/dist/js/bootstrap.min.js"></script>
<script src="https://cdn.jsdelivr.net/npm/@bootcss/v3.bootcss.com@1.0.10/assets/js/docs.min.js"></script>
<!-- IE10 viewport hack for Surface/desktop Windows 8 bug -->
<script src="https://cdn.jsdelivr.net/npm/@bootcss/v3.bootcss.com@1.0.10/assets/js/ie10-viewport-bug-workaround.js"></script>
</body>
</html>
|
index.html
1
2
3
4
5
6
|
{{template "base.html" .}}

{{define "content"}}
 <h3>首页</h3>

{{end}}
|
archives.html
1
2
3
4
5
|
{{template "base.html" .}}

{{define "content"}}
 <h3>文章归类</h3>
{{end}}
|
main.go
 1
 2
 3
 4
 5
 6
 7
 8
 9
10
11
12
13
14
15
16
17
18
19
20
21
22
23
24
25
26
27
28
29
30
31
32
33
34
|
package main

import (
	"github.com/gin-contrib/multitemplate"
	"github.com/gin-gonic/gin"
	"net/http"
)


func index(c *gin.Context) {
	c.HTML(http.StatusOK, "index", gin.H{})
}
func archives(c *gin.Context) {
	c.HTML(http.StatusOK, "archives", gin.H{})
}

func createMyRender() multitemplate.Renderer {
	r := multitemplate.NewRenderer()
	r.AddFromFiles("index", "templates/base.html", "templates/index.html")
	r.AddFromFiles("archives", "templates/base.html", "templates/archives.html")

	return r
}

func main() {

	router := gin.Default()
	// 返回一个html页面
	// router.LoadHTMLGlob("templates/*")  // 继承会发生block覆盖
	router.HTMLRender = createMyRender()
	router.GET("/", index)
	router.GET("/archives", archives)
	router.Run() // 监听并在 0.0.0.0:8080 上启动服务
}
|
五、Gorm
5.1、gorm介绍
5.2、连接数据库
中文文档: https://www.kancloud.cn/sliver_horn/gorm/1861152
连接数据库
 1
 2
 3
 4
 5
 6
 7
 8
 9
10
11
12
13
14
15
16
17
18
19
|
package main

import (
	"fmt"
	"gorm.io/gorm"
	"gorm.io/driver/mysql"
	"time"
)

// Gorm

func main()  {
	// 连接mysql
	dsn := "用户名:密码@tcp(127.0.0.1:3306)/数据库名?charset=utf8mb4&parseTime=True&loc=Local"
	if err != nil {
		fmt.Println("err:",err)
	}

}
|
5.3、声明模型
5.3.1、声明模型基本语法
 1
 2
 3
 4
 5
 6
 7
 8
 9
10
11
12
|
// 创建表对应的结构体
	type Book struct {
		ID    uint           `gorm:"primaryKey"`
		Title string         `gorm:"type:varchar(100);unique;not null"`
		Price int64
		Is_publish byte       `gorm:"default:1"`
		Publish_date *time.Time
		CreateTime *time.Time `gorm:"autoCreateTime"`
		UpdateTime *time.Time `gorm:"autoCreateTime"`
	}
// 自动迁移
db.AutoMigrate(&Book{})
|
5.3.2、gorm.Model
GORM 定义一个 gorm.Model 结构体,其包括字段 ID、CreatedAt、UpdatedAt、DeletedAt
1
2
3
4
5
6
7
|
// gorm.Model 的定义
type Model struct {
  ID        uint           `gorm:"primaryKey"`
  CreatedAt time.Time
  UpdatedAt time.Time
  DeletedAt gorm.DeletedAt `gorm:"index"`
}
|
您可以将它嵌入到您的结构体中,以包含这几个字段
 1
 2
 3
 4
 5
 6
 7
 8
 9
10
11
12
|
type User struct {
  gorm.Model
  Name string
}
// 等效于
type User struct {
  ID        uint           `gorm:"primaryKey"`
  CreatedAt time.Time
  UpdatedAt time.Time
  DeletedAt gorm.DeletedAt `gorm:"index"`
  Name string
}
|
5.4、gorm单表操作
5.4.1、添加记录
 1
 2
 3
 4
 5
 6
 7
 8
 9
10
11
12
13
14
|
// 添加一条记录
book01 := Book{Title: "金瓶梅",Price:99}
ret:=db.Create(&book01)

fmt.Println(book01.ID)             // 返回插入数据的主键
fmt.Println(ret.Error)             // 返回 error
fmt.Println(ret.RowsAffected)      // 返回插入记录的条数


// 批量插入记录
books := []Book{{Title: "西游记",Price:100},{Title: "红楼梦",Price:200},{Title: "三国演义",Price:300},{Title: "水浒传",Price: 199}}
db.Create(&books)
//每批500条创建(gorm2新添加方法)
//db.CreateInBatches(books,500)
|
db.Debug() 会打印sql日志
5.4.2、查询记录
(1) 查询全部记录
1
2
3
4
5
6
7
|
books := []Book{}
result := db.Find(&books)
fmt.Println(result.RowsAffected )
fmt.Println(books)
for _, book := range books {
    fmt.Println(book.Title,book.Price)
}
|
(2) 查询单条记录
1
2
3
4
5
6
|
 book:=Book{}
 db.First(&book) // 按id升序排序,获取第一条记录
 fmt.Println(book1)
 book:=Book{}
 db.Last(&book)  // 按id升序排序,获取最后一条记录
 fmt.Println(book)
|
(3) String 条件
1
2
3
4
5
6
7
|
db.Where("title = ?","红楼梦").First(&book)
db.Where("price <> ?",200).Find(&books)
db.Where("price between ? and ?",100,200).Find(&books)
db.Where("price in ?",[]int64{0,100,200}).Find(&books)
db.Where("title like  ?","金%").Find(&books)
db.Where("create_time >  ?","2021-01-01 00:00:00").Find(&books)
db.Where("publish_name = ? AND price > ?","苹果出版社",300).Find(&books)
|
(4) Struct & Map 条件
1
2
3
4
5
6
7
8
|
// Struct条件
db.Where(&Book{PublishName: "苹果出版社",Price:200}).Find(&books)
// 注意: 使用结构作为条件查询时,GORM 只会查询非零值字段。例如:
db.Where(&Book{PublishName: "苹果出版社",Price:0}).Find(&books)
// SELECT * FROM Books WHERE PublishName = "苹果出版社";
// Map条件
db.Where(map[string]interface{}{"publish_name": "苹果出版社","price":0}).Find(&books)
//  SELECT * FROM `books` WHERE `price` = 0 AND `publish_name` = '苹果出版社'
|
(5) Select、Omit语句
针对字段查询
1
2
3
4
|
// SELECT `title`,`price` FROM `books`
db.Select("title", "price").Find(&books)
// SELECT `books`.`id`,`books`.`publish_date`,`books`.`publish_id` FROM `books`
db.Omit("title", "price").Find(&books)
|
(6) Not Or语句
1
2
3
4
|
// Not语句:用法类似于Where
db.Not("price between ? and ?",100,200).Find(&books)
// Or语句
db.Where("price = ?",200).Or("title like  ?","红%").Find(&books)
|
(7) 其他查询语句
1
2
3
4
5
6
|
 // 排序
 db.Order("price desc, id").Find(&books)
 // limit
 db.Limit(2).Find(&books)
 // db.Offset(3).Find(&users)
 db.Limit(2).Offset(1).Find(&books)
|
5.4.3、删除记录
1
2
3
4
5
6
7
|
// 删除一条记录
book:=Book{ID: 2}
db.Delete(&book)
// 按条件删除
db.Where("price between ? and ?",200,300).Delete(Book{})
// 删除所有记录
db.Where("1 = 1").Delete(&Book{})
|
5.4.4、更新记录
 1
 2
 3
 4
 5
 6
 7
 8
 9
10
11
12
13
14
15
16
17
|
// 更新所有字段
book := Book{}
db.First(&book)
book.Title = "新西游记"
db.Save(&book)
// update更新单个字段
book := Book{ID: 20}
db.Model(&book).Update("title","金瓶梅")
book := Book{}
db.Model(&book).Where("id = ?",20).Update("title","金瓶梅")
// update更新多个字段
// 通过 `struct` 更新多个字段,不会更新零值字段
book := Book{}
db.Model(&book).Where("id = ?",20).Updates(Book{Title:"金瓶梅",Price: 333})
// 通过 `map` 更新多个字段,零值字段也会更新
book := Book{}
db.Model(&book).Where("id = ?",20).Updates(map[string]interface{}{"title":"金瓶梅","publish_name":"西瓜出版社"})
|
5.5、gorm关联表创建
 1
 2
 3
 4
 5
 6
 7
 8
 9
10
11
12
13
14
15
16
17
18
19
20
21
22
23
24
25
26
27
28
29
30
31
32
33
34
35
36
37
38
39
40
41
42
43
44
45
46
47
48
49
50
51
52
53
54
55
56
57
58
59
60
61
62
|
package main

import (
	"fmt"
	"gorm.io/driver/mysql"
	"gorm.io/gorm"
	"time"
)

// 创建表对应的结构体

// 书籍类型
type Book struct {
	gorm.Model

	Title       string `gorm:"type:varchar(100);unique;not null"`
	Price       int64
	PublishDate *time.Time

	// 一对多
	PublishID int
	Publish   Publish
	// 多对多
	Authors []Author `gorm:"many2many:book_authors;"`
}

// 出版社类型
type Publish struct {
	gorm.Model
	Name string `gorm:"type:varchar(100);unique;not null"`
}

// 作者类型
type Author struct {
	gorm.Model
	Name string `gorm:"type:varchar(100);unique;not null"`
	Age  int
}

func main() {
	// 连接mysql
	dsn := "root:@tcp(127.0.0.1:3306)/bookSys?charset=utf8mb4&parseTime=True&loc=Local"
	// 创建日志对象
	newLogger := logger.New(
		log.New(os.Stdout, "\r\n", log.LstdFlags), // io writer
		logger.Config{
			//SlowThreshold: time.Second,   // 慢 SQL 阈值
			LogLevel: logger.Info, // Log level
		},
	)

	db, err := gorm.Open(mysql.Open(dsn), &gorm.Config{
		Logger: newLogger, // 日志配置
	})


	// 自动迁移
	db.AutoMigrate(&Book{})
	db.AutoMigrate(&Publish{})
	db.AutoMigrate(&Author{})

}
|
5.6、gorm创建关联记录
如果您的模型定义了任何关系(relation),并且它有非零关系,那么在创建时这些数据也会被保存
 1
 2
 3
 4
 5
 6
 7
 8
 9
10
11
12
13
14
15
16
17
18
19
20
21
22
23
24
25
26
27
28
29
30
31
32
33
34
35
36
37
38
39
40
41
42
43
44
45
46
47
48
49
50
51
52
53
54
55
56
57
58
59
60
61
62
63
64
65
66
67
68
69
70
71
72
73
74
75
76
77
78
79
80
81
82
83
84
85
86
87
88
89
90
91
92
93
94
95
|
package main

import (
	"fmt"
	"gorm.io/driver/mysql"
	"gorm.io/gorm"
	"time"
)

// 创建表对应的结构体

// 书籍类型
type Book struct {
	gorm.Model

	Title       string `gorm:"type:varchar(100);unique;not null"`
	Price       int64
	PublishDate *time.Time

	// 一对多
	PublishID int
	Publish   Publish
	// 多对多
	Authors []Author `gorm:"many2many:book_authors;"`
}

// 出版社类型
type Publish struct {
	gorm.Model
	Name string `gorm:"type:varchar(100);unique;not null"`
}

// 作者类型
type Author struct {
	gorm.Model
	Name string `gorm:"type:varchar(100);unique;not null"`
	Age  int
}

func main() {
	// 连接mysql
	dsn := "root:@tcp(127.0.0.1:3306)/bookSys?charset=utf8mb4&parseTime=True&loc=Local"
	// 创建日志对象
	newLogger := logger.New(
		log.New(os.Stdout, "\r\n", log.LstdFlags), // io writer
		logger.Config{
			//SlowThreshold: time.Second,   // 慢 SQL 阈值
			LogLevel: logger.Info, // Log level
		},
	)

	db, err := gorm.Open(mysql.Open(dsn), &gorm.Config{
		Logger: newLogger, // 日志配置
	})


	// 自动迁移
	db.AutoMigrate(&Book{})
	db.AutoMigrate(&Publish{})
	db.AutoMigrate(&Author{})

	// (1) 单表添加记录
	// 添加三个作者
	//authors := []Author{{Name: "yuan",Age: 22},{Name: "alvin",Age: 25},{Name: "rain",Age: 32}}
	//db.Create(&authors)
	// 添加三个出版社
	//var publishes = []Publish{{Name: "柠檬出版社"},{Name: "西瓜出版社"},{Name: "苹果出版社"}}
	//db.Create(&publishes)

	// (2) 关联创建,即一对多和多对多添加记录

	// 案例1
	var book01 = Book{
		Title: "乱世佳人",
		Price: 100,
		//PublishID:1,  // 出版社存在的情况
		Publish: Publish{Name: "哈密瓜出版社"},
	}
	db.Create(&book01)

	// 案例2
	var athors = make([]Author, 5)
	db.Where("name in ?", []string{"yuan", "rain"}).Find(&athors)
	fmt.Println(athors)

	var book02 = Book{
		Title:     "傲慢与偏见",
		Price:     100,
		PublishID: 2, // 出版社存在的情况
		Authors:   athors,
		// Authors: []Author{{Name: "张三",Age: 22},{Name: "李四",Age: 34}},  // 作者不存在的情况
	}
	db.Create(&book02)

}
|
5.7、gorm关联查询
5.7.1、Preload(子查询 )
GORM 允许在 Preload 的其它 SQL 中直接加载关系
案例1:查询西游记的出版社名称
1
2
3
4
|
var book01 = Book{Title: "西游记"}
db.Where(&book01).Preload("Publish").Find(&book01)
fmt.Println(book01)
fmt.Println(book01.Publish.Name)
|
案例2:查询红与黑的出版社和作者名
1
2
3
4
5
|
var book02 = Book{Title: "傲慢与偏见"}
db.Where(&book02).Preload("Publish").Preload("Authors").Find(&book02)
fmt.Println(book02)
fmt.Println(book02.Publish.Name)
fmt.Println(book02.Authors)
|
案例3:查询西游记的作者信息
1
2
3
|
var book02 = Book{Title: "西游记"}
db.Where(book02).Preload(clause.Associations).Find(&book02)
fmt.Println(book02.Authors)
|
案例4:查询柠檬出版社出版的所有书籍名称
反向引用:需要给Publish表加上成员变量Books:Books []Book
1
2
3
4
5
|
// pub := []Publish{} // 所有出版社的信息
pub := Publish{ID: 2}
db.Preload("Books.Authors").Find(&pub)   // 嵌套预加载
fmt.Println("pub:::", pub)
fmt.Println(pub.Books)
|
案例5:查询ID为1的作者出版的所有书籍名称
反向引用:Author表加上成员变量:
1
|
Books []Book `gorm:"many2many:book_authors;OnDelete:CASCADE;"`
|
1
2
3
4
|
author:=Author{ID: 1}
db.Preload("Books").Find(&author)
fmt.Println("author",author)
fmt.Println("author",author.Books)
|
5.7.2、Joins 查询
Preload 在一个单独查询中加载关联数据。而 Join Preload 会使用 inner join 加载关联数据
案例1:查询西游记的出版社名称
1
2
3
4
|
var book01 = Book{Title: "西游记"}
db.Joins("Publish").Find(&book01)
fmt.Println(book01)
fmt.Println(book01.Publish.Name)
|
案例2:查询西游记的作者名
1
2
3
|
authors := []Author{}
db.Table("Books").Select("books.*,authors.name").Joins("left join  book_authors on book_authors.book_id=books.id left join authors  on book_authors.author_id = authors.id").Where("books.title=?","西游记").Find(&authors)
fmt.Println(authors)
|
5.7.3、Association增删改查
(1)、Association查询
1
2
3
4
5
6
|
// 案例1:查询西游记的作者信息
book01 := Book{Model: gorm.Model{ID: 10}} // 必须是ID过滤
// book01 := Book{Title: "傲慢与偏见"} // 不可以
var authors = []Author{}
db.Model(&book01).Association("Authors").Find(&authors)
fmt.Println(authors)
|
(2) Association添加 // upsert模式
1
2
3
|
a1 := Author{}
db.Where(Author{Model: gorm.Model{ID: 1}}).Find(&a1)
db.Model(&Book{Model: gorm.Model{ID: 10}}).Association("Authors").Append([]Author{a1, {Name: "Jeorge", Age: 22}})
|
(3) Association删除
1
2
3
|
book02 := Book{Model: gorm.Model{ID: 10}}
db.Model(&book02).Association("Authors").Delete(Author{Model: gorm.Model{ID: 1}})
db.Model(&book02).Association("Authors").Clear()
|
(4) Association替换
1
2
3
|
book03 := Book{Model: gorm.Model{ID: 10}}
db.Model(&book03).Association("Authors").Replace([]Author{{Name: "Jeorge", Age: 22}}) // reset
db.Model(&book03).Association("Authors").Replace(&Author{Model: gorm.Model{ID: 2}})   // reset
|
(5) Association计数
1
2
3
4
|
// 统计傲慢与偏见的作者的个数
book04 := Book{Model: gorm.Model{ID: 10}}
ret := db.Model(&book04).Association("Authors").Count()
fmt.Println(ret)
|
六、Ajax方法
1
2
3
4
5
6
7
|
// 定义全局的CORS中间件
func Cors() gin.HandlerFunc {
    return func(c *gin.Context) {
        c.Writer.Header().Add("Access-Control-Allow-Origin", "*")
        c.Next()
    }
}
|
七、中间件
7.1、声明中间件
 1
 2
 3
 4
 5
 6
 7
 8
 9
10
11
12
13
14
15
16
17
18
19
20
21
22
23
24
25
26
27
28
29
30
31
32
33
34
35
36
37
38
39
|
package main

import (
	"fmt"
	"github.com/gin-gonic/gin"
)

func main()  {
	app := gin.Default()
	// 全局注册中间件
	app.Use(M1())
	app.Use(M2())
	app.GET("/", func(context *gin.Context) {
		fmt.Println("Hello yuan")
		context.Writer.WriteString("Hello World")
	})
	app.Run()
}

func M1() gin.HandlerFunc {
	return func(context *gin.Context) {
		// 路由处理前执行
		fmt.Printf("M1视图函数前执行\n")
		// context.Abort()
		context.Next()
		// 路由处理后执行
		fmt.Printf("M1视图函数后执行\n")
	}
}

func M2() gin.HandlerFunc {
	return func(context *gin.Context) {
		// 路由处理前执行
		fmt.Printf("M2视图函数前执行\n")
		context.Next()
		// 路由处理后执行
		fmt.Printf("M2视图函数后执行\n")
	}
}
|
7.2、gin默认中间件
gin.Default()默认使用了Logger和Recovery中间件,其中:
Logger中间件将日志写入gin.DefaultWriter,即使配置了GIN_MODE=release。Recovery中间件会recover任何panic。如果有panic的话,会写入500响应码。
如果不想使用上面两个默认的中间件,可以使用gin.New()新建一个没有任何默认中间件的路由。
注意:当在中间件或handler中启动新的goroutine时,不能使用原始的上下文(c *gin.Context),必须使用其只读副本(c.Copy())。
7.2、中间件应用
八、Cookie与Session
8.1、Cookie
1. Cookie是什么
HTTP是无状态协议,服务器不能记录浏览器的访问状态,也就是说服务器不能区分两次请求是否由同一个客户端发出
Cookie就是解决HTTP协议无状态的方案之一,中文是小甜饼的意思
Cookie实际上就是服务器保存在浏览器上的一段信息。浏览器有了Cookie之后,每次向服务器发送请求时都会同时将该信息发送给服务器,服务器收到请求后,就可以根据该信息处理请求
Cookie由服务器创建,并发送给浏览器,最终由浏览器保存
2. 读写Cookie
1
2
3
4
|
// 设置Cookie
c.SetCookie("xxx","yyy")
// 获取Cookie
c.Cookie("xxx")   // "yyy"
|

(1)登录案例
 1
 2
 3
 4
 5
 6
 7
 8
 9
10
11
12
13
14
15
16
17
18
19
20
21
22
23
24
25
26
27
28
29
30
31
32
33
34
35
36
37
38
39
40
41
42
43
44
45
46
47
48
49
50
51
52
|
package main

import (
	"github.com/gin-gonic/gin"
	"net/http"
)

func index(c *gin.Context) {

	isLogin, _ := c.Cookie("isLogin")

	if isLogin == "true" {
		user, _ := c.Cookie("username")
		c.HTML(http.StatusOK, "index.html", gin.H{
			"username":user,
		})
	} else {
		c.Redirect(302, "/login")
	}
}

func login(c *gin.Context) {
	if c.Request.Method == "GET" {
		c.HTML(http.StatusOK, "login.html", nil)
	} else {
		user := c.PostForm("user")
		pwd := c.PostForm("pwd")
		if user == "yuan" && pwd == "123" {
			// 给客户端设置cookie
			// maxAge int, 单位 s
			// path cookie  所在目录
			// domain string  域名
			// secure  是否只能通过https访问
			// httponly bool  是否允许别人通过js获取自己的cookie
			c.SetCookie("isLogin", "true", 2000000, "/", "127.0.0.1", false, true)
			c.SetCookie("username", user, 20000000, "/", "127.0.0.1", false, true)
			//c.Redirect(302, "/index")
			c.Redirect(302, "/index")
		} else {
			c.Redirect(302, "/login")
		}
	}
}

func main() {
	r := gin.Default()
	// 返回一个html页面
	r.LoadHTMLGlob("templates/*")
	r.Any("/login", login)
	r.GET("/index", index)
	r.Run() // 监听并在 0.0.0.0:8080 上启动服务
}
|
(2)最后访问时间案例
 1
 2
 3
 4
 5
 6
 7
 8
 9
10
11
12
13
14
15
16
17
18
19
20
21
22
23
24
25
26
27
28
29
30
31
|
package main

import (
	"fmt"
	"github.com/gin-gonic/gin"
	"time"
)

func index(c *gin.Context) {

	// 获取cookie
	lastVist, _ := c.Cookie("lastVist")
	fmt.Println("lastVist",lastVist)

	// 设置cookie
	now := time.Now().String()[:19]
	c.SetCookie("lastVist", now, 100, "/", "127.0.0.1", false, true)

	c.HTML(200, "index.html", gin.H{
		"lastVist": lastVist,
	})

}

func main() {
	r := gin.Default()
	// 返回一个html页面
	r.LoadHTMLGlob("templates/*")
	r.GET("/index", index)
	r.Run() // 监听并在 0.0.0.0:8080 上启动服务
}
|